Month: January 2010

  • More modulation madness

    Fresh off the press, there is another update to MonoParaSteppa which brings some quite interesting new features. First of all, the device drop down now includes the Track Mixer which allows you to modulate Track volume, Panning, all of the Sends as well as – in case of inserting the device into the master track – the Cue volume (not sure that’s needed) and the crossfader.

    In addition to that, version 1.1 introduces using any waveform as modulation sequence, just drag a .wav or .aiff file onto the respective device section, and the waveform will be mapped onto the sequence. A sine, square and triangle waveform is already included and can be accessed via the action menu (the three bottom entries). It works quite smooth with increasing the step number to 64 and using glide 2 mode. The loop braces of the step object give you even more control which section of the waveform is used for modulation.

    The other new thing is the introduction of the MonoParaSteppaMidi device which is an (almost) exact replica of the MonoParaSteppa one. So why the hell another device ?  There is one important difference, while the original device sports a beat detection mode (based on transient analysis), the steps of the MIDI device can be triggered via note-on’s which opens quite some new options as well.

    Download

    MonoParaSteppa.amxd (v1.1)

    MonoParaSteppaMidi.amxd (v1.1)

  • Update: MonoParaSteppa v1 – more goodies

    After some positive feedback for the beta version of MonoParaSteppa, there is an update for the parameter modulation device. Besides bugfixing, the main changes are the introduction of a beat detection mode and more extensive monome support.

    With Beat detection, a new modulation step is executed upon detection of a beat. Of course, this can be adjusted per parameter and allows for activation of audio or midi devices which need explicit triggering (e.g. stutter effects). The sensitivity of the beat detection algorithm can be adjusted globally by setting the minimum velocity (the slider in the left section, below UDP settings). Beat detection mode itself can be activated with the toggle on the right side of each parameter area.

    The other changes are mainly related how the device can be controlled with the monome. There are four different modes now which are all activated with button 1 of the control row (row 8):

    1. Sequence Mode (default mode, no LED)
    2. Function Mode (short press, LED is on)
    3. Value Mode (button press longer than 1/2 sec, slow blink)
    4. Range Mode (button press longer than 2 secs, fast blink)

    In Sequence mode, all 6 sequences can be edited directly on the monome. Changes in the device are reflected as well, and all monome sizes are supported (you might need to adjust the step length to take advantage of a 128 or 256). The sequence to be shown can be chosen with buttons 3-8 of the bottom row (control row).

    In all remaining modes,all parameter/sequences is represented by columns 3-8. In Function Mode, it is possible to alter the sequence drastically. The buttons of each column are mapped to the following actions (in order).

    • up: move the whole sequence up by 1
    • down: move the whole sequence down by 1
    • sort asc: sort the sequence ascending
    • sort desc: sort the sequence descending
    • scramble: change the order of the sequence steps randomly
    • random: generate a random sequence
    • continous random: generate continously random values
    • random timing: use random timing intervals between steps

    In Value Mode, each column displays the current value of the parameter whether the sequencer is running or not. If not, you can change the parameter value manually via buttons 1-7 of each column. The buttons of the control row can be used to start/stop the sequencer.

    In Range Mode, the modulation range (the range which the parameter value can have) can be adjusted per parameter via buttons 1-7 of each column. In order to define whether one wants to adjust the min or the max amout, the buttons of the control row can be used. If not pressed, the lower boundary will be adjusted when pressing a button within the respective column, if keeping the bottom row button pressed, the upper boundary will be adjusted.

    Please note that for the beat detection mode, the max external bonk~ is required which can be downloaded here (for Mac) and here (for Windows). For Mac, it is included within the frozen device, so you guys don’t need to worry.

    For now, the only things left to be done (beside any interesting suggestions from you guys) is “ticking the documentation box” and introducing the ability to recall parameter assignments. So stay tuned !

    Download

    MonoParaSteppa.amxd

  • MonoParaSteppa – take control of your devices

    One thing missing from MonoLive so far was the ability to control devices and their parameters via Monome. There are already quite some good M4L devices floating around such as the Single Parameter Sequencer or the 3X Parameter Sequencer, but none to be controlled via a monome.

    So I made my own (partially based on the second one above, thx Ivehon), and now it’s become quite a beast. Besides adding monome support, the idea was to make it work standalone as well (without using the whole MonoLive framework), and to add “some” randomness to it. Mission accomplished.

    Main features:

    • controllable via Monome or without
    • Step Sequencer Control of up to 6 device parameters and up to 64 steps
    • Random timing between steps
    • Continous-random mode
    • Timing multiplier for longer intervals up to 32 bars
    • Quantization setting
    • 2 Glide modes (fast and slow)
    • Full synchronisation between device and monome
    • Multiple sequencer directions
    • Randomisation of step intervals, quantization and time multiplier

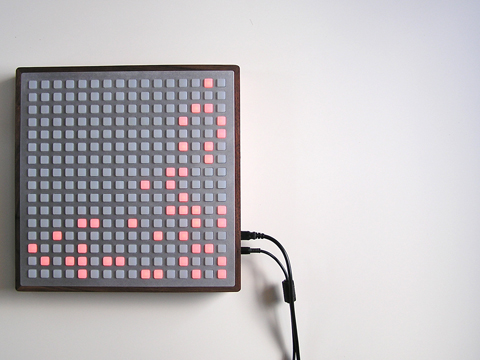
    In terms of monome control, the device supports three modes which can switched via the button 1 of the bottom row (control row). The default mode (no LED) allows you to select the respective parameter with button 3-8. The respective sequence will be displayed and can be changed with the buttons of row 1-7.

    In Change mode (press button 1 shortly, will be lit), buttons 3-8 are assigned with the following functions (which can also be executed via mouse directly in Live):

    Up: raises the step values for the whole sequence

    Down: lowers the step values for the whole sequence

    Sort 1: Sort the sequence ascending

    Sort -1: Sort the sequence descending

    Scramble: Randomize the order of the sequence

    Random: Generate a random sequence

    In Current Mode (keep button 1 pressed for half a second, LED will blink), buttons 3-7 of the control row 8 represent the 6 parameter sequences and allow you to start/stop each sequence. If the sequencer for the respective parameter is running, the LED will be lit. The columns 3-8 above the control row will show the current value of the parameter as it is being modulated via the sequencer. If the sequencer is not running, you can modify the value for the respective parameter manually. This allows for mixing automatic modulation with live changes.

    As usual, it’s the first shot (v0.9), so let me know what does and does not work, and sorry for the (as of yet) nonexisting documentation, I will work on it.

    Download

    MonoParaSteppa.amxd

  • Get your early Xmas present

    Today is another one of those very few occasions that the monome team is releasing a bunch of new devices.

    This time, it is a 200 batch of the slick and brand new 64 grayscale devices. Due to heavy demand, the order links will be posted 1st of january, 1pm EST sharp, so check the time and have your google checkout account handy.

    Good luck, they will be gone very fast.